White chocolate oatmeal Craisin cookies

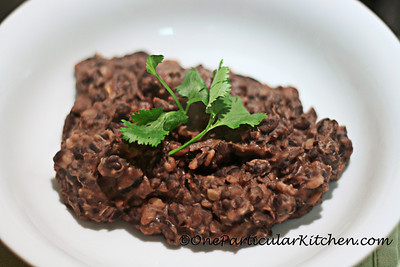
I had a morning appointment at Redo in Franklin (if you haven’t been, go now — love them) today and, as I am wont to do, brought The Kiddo with me. Fortunately he travels well, especially when the iPod is loaded up with Super Why. Know what else travels well? These cookies! I can neither confirm nor deny that they are lovely for breakfast sandwiched around a healthy smear of peanut butter.

This varies just a bit from the recipe on the Craisin bag, so here ’tis:

  • 1 cup butter, softened
  • 3/4 cup packed brown sugar
  • 3/4 cup white sugar
  • 2 eggs
  • 1 teaspoon vanilla extract
  • 2 cups oats
  • 2 cups all-purpose flour
  • 1 teaspoon baking soda
  • 1 teaspoon baking powder
  • 1 teaspoon salt
  • 1 bag Craisins
  • 1 cup white chocolate chips

To make the goodness:

  1. Preheat oven to 350F
  2. Beat butter, sugar, eggs and vanilla for 5 minutes at medium speed till mixture is light and fluffy
  3. Combine dry ingredients in a second bowl and add to butter mixture one cup at a time, mixing till just incorporated
  4. Stir in Craisins and white chocolate chips
  5. Drop by rounded spoonfuls onto nonstick or greased cookie sheets and bake for about 10 minutes until they’re just starting to brown around the edges
  6. Cool on cookie sheets for 2 minutes, then move to wire rack to completely cool

This makes about 5 dozen, and they  freeze beautifully! Enjoy!

Mashed black beans

I recently came across this Rick Bayless recipe for simple mashed black beans. Can you ever go wrong with a Rick Bayless recipe? I’m saying no. With a little tweaking for what I had on hand and what sounded good, I ended up with this:

  • 2 Tbsp. bacon drippings (I always have some in the fridge)
  • 3 garlic cloves
  • 1 15-oz can black beans, drained and rinsed
  • Salt

In the time it took The Yankee too cook up our fajitas (more on that later), I had these done like so:

  1. Put a dry skillet over medium heat and drop in three unpeeled garlic cloves; keep turning them till the skin is nice and browned and the garlic inside is soft; set aside to cool enough to handle, then remove skins
  2. While the garlic is roasting, drain and rinse a can of black beans
  3. Remove the pan from the heat for just a minute and drop in 2 Tbsp. bacon fat; let it melt (it will do this quickly and will also smoke quickly, thus the part about removing the pan from the heat), then drop in softened garlic and crush the cloves with a potato masher
  4. Pour in can of beans and give it all a good stir to incorporate the garlic
  5. After everything is heated through, use a potato masher or the back of a wooden spoon to mash the beans; you’re not looking for ice-cream texture here, just smush them up a bit
  6. Take the pan off the heat and add in as much water (probably 2-3 Tbsp) as is needed to be able to easily spread or spoon the beans
  7. Season with salt to taste — 1/2 teaspoon or so

These are fantastic eaten as is, sprinkled with cheese, on nachos, with fajitas, with burritos… use your imagination!

Amish friendship bread

Ah, friendship bread. Let’s be honest: it’s like a chain letter. But since I end up with this: I say it’s okay.

Let’s start at the beginning. Don’t have anyone dying to give you some starter? You can make your own (recipe found here):

  • 1 pkg. active dry yeast
  • 1/4 cup warm water (110°F)
  • 1 cup all-purpose flour, sifted
  • 1 cup white sugar
  • 1 cup warm milk (110°F)

Now get it going:

  1. Dissolve the yeast in the warm water and let it sit for about ten minutes. Stir.
  2. in a two quart glass or plastic (no metal!) container, combine flour and sugar; make sure they’re well combined so the flour doesn’t get lumpy in the milk
  3. Add in the warm milk and dissolved yeast/water, stirring slowly till everything is incorporated; the mixture will get bubbly
  4. Pour mixture into a one-gallon ziptop bag and seal tightly, pushing out as much air as possible

That’s it! That is now day 1 completed. Then you follow the directions as if you’ve received the starter:

Day 2: Mash the bag, “burp” the air out if necessary
Day 3: Mash the bag, “burp” the air out if necessary
Day 4: Mash the bag, “burp” the air out if necessary
Day 5: Add to the bag: 1 c. all-purpose flour, 1 c. sugar, 1 c. cold milk. Mash the bag (yep, it sits on the counter after this — weird but true)
Day 6: Mash the bag, “burp” the air out if necessary
Day 7: Mash the bag, “burp” the air out if necessary
Day 8: Mash the bag, “burp” the air out if necessary
Day 9: Mash the bag, “burp” the air out if necessary

Day 10: Pour the contents of the bag into a non-metal bowl.
Add:

  • 1 1/2 c. all-purpose flour
  • 1 1/2 c. sugar
  • 1 1/2 c. cold milk.

Then:

  • Write the date (so your friends know what day one is) on four gallon size zip bags
  • Measure out one cup of batter into each bag
  • Keep one starter bag for yourself; give the other three to friends along with a printed copy of the recipe (Word doc) (remember that if you keep a starter, you will be baking every 10 days)

Time to bake!

Preheat your oven to 325 degrees and grease two small or one large loaf pan

To your remaining starter (about one cup), add:

  • 3 eggs
  • 2/3 cup vegetable oil
  • 1/2 cup cold milk
  • 2 tsp vanilla
  • 1 cup sugar
  • 2 cups AP flour
  • 1/2 tsp salt
  • 1 1/4 tsp baking powder
  • 1/2 tsp baking soda
  • 1 1/2 tsp cinnamon

The master recipe calls for a mixture of 1/4 c. sugar and 1/2 tsp cinnamon for dusting/topping. Use 2/3 of this mixture to dust the greased pans, and then sprinkle the remaining on top of the batter after poured into the pans. Bake for 1 hour. Cool until bread loosens from the sides, about 10 minutes.

Variation: some recipes call for 2 small boxes instant vanilla pudding mix and/or substituting 1/2 applesauce and 1/2 oil. You can also play around with different flavors of pudding mixes and additions of fruits, nuts, chocolate chips, and spices.

Two great websites with tips and recipes:

http://www.armchair.com/recipe/amish/amish.html
http://www.momswhothink.com/bread-recipes/amish-friendship-bread.html

I was surprised at how many people were interested in this starter — I had no trouble giving it away, and even mailed a couple of them with no problems. Enjoy!

Pizza Rolls

I was trying to get the kiddo to bed one day this week, and I was thinking about cinnamon rolls. Look, I’m not proud, but that’s what it was. Then I was thinking that it would behoove me to actually think about what to make for supper the next day instead. And then I was thinking that I had dough in the fridge that I should use.

And then I was thinking about pizza rolls.

So the next day, here’s what I took out:

  • My icebox dough (you can also buy dough in the deli at Publix, which I love)
  • Pizza sauce (pick your favorite)
  • Pepperoni, chopped (or whatever toppings float your boat – but chopped so it’s easier to slice through)
  • Mozzarella cheese
  • Dental floss (but not for what you think)

From there it was easy!

  1. Preheat the oven to 350
  2. Roll out the dough into a rectangle
  3. Top with a thin layer of sauce — you don’t want things getting soggy
  4. Sprinkle with chopped pepperoni (etc.) and cheese
  5. Roll it up! I rolled from the short end because I didn’t need to end up with that many rolls — just the Yankee and I were eating
  6. Break out the dental floss and use it to cut the rolls: slide the floss under the roll, cross the ends over the top like you’re going to tie a knot, then pull them all the way through the dough so the floss is straight again; this slices it clean and keeps your rolls from getting flattened as you slice
  7. Place the rolls in an oiled casserole dish with the pretty sides showing (if you’re making these for a party and want them easier to handle individually bake them in a muffin tray instead)
  8. Sprinkle the top with more cheese
  9. Bake at 350F till the cheese on top is melty and bubbly

Enjoy!

Cheesy chili dip

Hi, it’s ridiculously simple week on One Particular Kitchen. Care to join me?

This dip calls for exactly four ingredients:

  1. A block of cream cheese
  2. A can of chili
  3. An 8 oz bag of shredded cheese
  4. A bag of chips

When my alma mater is losing playing, I don’t want to spend all day in the kitchen! This is so quick and easy to throw together that I can serve a crowd (recipe is easily doubled) and keep everyone full without missing a Crompton interception play.

So here’s what you do:

  1. Using the foil from the package, press the cream cheese into the bottom of a pie plate or baking dish
  2. Pour over the chili (I use Vietti, or leftover homemade chili)
  3. Sprinkle on the cheese (I used colby jack; cheddar is also great)
  4. Bake at 350F till everything is melty and bubbly. Serve with chips!

Whatever you do, please do not use reduced fat sprinkling cheese — it just doesn’t melt right, and meltiness (uh, it’s a word) is a key trait of this dish.

Now. How easy is that?